 |
| Chocolate cake with buttercream icing, covered in and accented with homemade marshmallow fondant |
I made the marshmallow fondant earlier this week, using a basic recipe I found on cakecentral.com:
16 oz mini marshmallows
3 tablespoons of water
2 lbs of powdered sugar
pinch of salt
1/2 cup Crisco vegetable shortening
1 teaspoon vanilla flavoring
- Melt the marshmallows and water together in the microwave. Add the vanilla. Coat your hands, the bowl, and the counters in Crisco. Add the sugar and stir until you can not stir anymore. Dump the fondant out on your greased counter and kneed like you would a dough until it forms a stretchy yet solid ball. Wrap in plastic wrap and let it set at least overnight before use. -
I tinted the fondant pink with Wilton gel icing colors and rolled it out. Then, I cut a hole in the center of the round of fondant for Barbie and dropped it over the cake. Very quickly, before the fondant stretched too much, I pinched it all together in little gathers at the top of her waist, to form the pleats. The natural fall of the fondant formed a pretty skirt. I filled in the open places at the bottom with buttercream ruffles, to look like a petticoat. The rest, just kind of came to me as I did it, therefore, I can't really give specific instructions. If you have any questions, please feel free to ask me! =)
Here are some pictures of Barbie from every angle:
 |
| The petticoats are my favorite =) |
 |
| The back, with a flower bow at her waist |
 |
| The fondant fell and made pretty, natural looking fabric |
 |
| The little frosting star pillows are for candles - there are 7. |
 |
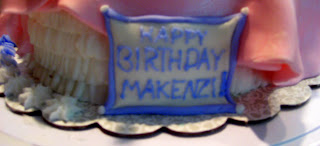
| I wish my writing was better. Practice, Practice, Practice! |
Well, there she is! I'm really happy with how Barbie turned out, and I really hope the family enjoys their cake. Lets all keep our fingers crossed that delivery goes smoothly!
Happy Baking!


No comments:
Post a Comment