Monday, September 27, 2010

Wilton Flowers and Cake Design Final Cake

Tonight was my last class for the Wilton Flowers and Cake Design course.  We learned the basket weave and got to use our flowers on a cake.  Since my birthday was yesterday, this is my "Day Late Birthday Cake" for myself, so, naturally, it was chocolate!  Due to lack of time, I used a cake mix (gasp!) that I doctored up, and it turned out wonderfully. 


Devils Food doctored cake mix with chocolate buttercream filling and vanilla buttercream frosting

Close up of royal icing roses (made during the Greys Anatomy premiere last week!)

View from the top - I LOVE the reverse shell border!


Our class manual told us to bring 3 cups of frosting, needless to say, it wasn't enough - only half my cake got the basket weave!  My teacher was really surprised that the  manual thought 3 cups would be enough, I guess now we know! You can see where I had the rest of the cake marked for the basket weave.
 Doctored Chocolate Cake Mix Cake:
1 package of Devils Food cake mix
1 package of Dream Whip
1 tablespoon of Meringue Powder
1 small (individual serving size) container of applesauce
1 cup of water
4 eggs
Method:
Mix all ingredients in a large bowl.  Beat on medium low speed for 5 minutes and pour into your prepared pan.  Bake at 350 degrees for approximately 50 minutes, or until a knife inserted in the center comes out clean. This recipe filled my 8x3 round pan very nicely, but would be plenty for two 8x2 pans, as well. 
**After much experimentation, I have learned that greasing and flouring your pan and lining the bottom with parchment paper makes for the PERFECT cake release!

This doctored cake mix saved me SO much time - I baked, cooled (in the freezer), made frosting, and lightly iced this cake in just 2 hours. Next Monday, I start the Fondant and Gumpaste course - I am so excited!

Happy Baking!

Sunday, September 19, 2010

Birthday Weekend!

My little boy turned 1 this weekend, so, we had a small family party for him!  I, of course, baked my heart out the day prior, and here are the results:
The Smash Cake - Vanilla butter cake, covered in marshmallow fondant, with strawberry buttercream and fresh strawberry filling.  The 1 is made of a gumpaste/fondant mix and the decorations are marshmallow fondant.

Football Cupcakes! Vanilla butter cake with chocolate buttercream, and fondant footballs with royal icing accents.
The smash cake was so much fun to make! My son's favorite food right now is strawberries, so I made him a strawberry cake. I used my vanilla butter cake recipe, found here, in an earlier post.  The strawberry buttercream was a basic buttercream recipe with about 1/2 cup fresh, pureed strawberries added in.
 
Smash cake torted and filled with fresh strawberries and strawberry buttercream
Smash cake covered in a crumb coat of strawberry buttercream.
The football cupcakes are the same vanilla butter cake as the smash cake.  The chocolate buttercream is a basic buttercream recipe with approximately 1/4 cocoa powder (to taste) added. 

I think he liked it!
Everything all together for his birthday table!
This weekend was also my friend from work's mom's birthday, so she asked me to make a few things for her.  I was originally going to make red velvet petit fours ... I attempted these and the results were delicious, but hideously ugly =(  SO, her petit fours turned into red velvet cake balls (bon bons) covered in chocolate.  I will never attempt petit fours again, until I am much more experienced! They were a horrible experience; so bad, I am not even going to post the pictures. In addition to the cake balls, I sent my friend with a mini red velvet cake and some strawberry cupcakes:

The cupcakes are the same vanilla butter cake and strawberry buttercream I used for the smash cake.  The flowers are some I made in my decorating class and have been saving to use for something "pretty".

<><><><><> 
Strawberry cupcake - vanilla buttercake with strawberry buttercream.  The purple and yellow flowers are gumpaste/fondant, the pink flowers are royal icing.

Some of my "left overs".  Chocolate covered red velvet bon bons, strawberry cupcakes, and a mini vanilla buttercake covered in chocolate buttercream.

 For the red velvet bon bons, I used my red velvet cake recipe, found in an earlier post, here.  I mushed up the cake and mixed it with some cream cheese buttercream frosting.  I then formed the mixture into ball shapes. I melted down some dark chocolate and white chocolate, and drizzled over the balls to achieve the look I was after.  I allowed the cake to show on the bottom, because I wanted to show the red velvet.  The ones pictured here are not the best ones, as I did not get a picture of the pretty ones I sent with my friend.  I have got to do better about keeping my camera handy!

I had so much fun this weekend!  I'm exhausted from being so busy, so I probably won't be baking again for a while, well, for at least a couple days.

Happy Baking!

Friday, September 10, 2010

Barbie Cake!

Earlier this week, I received my first ever real cake order! My mom often takes my left-over baking adventures to work, and a lady that works in the office (and has sampled my work), asked me to do her little girl's birthday cake.  The little girl, who is turning 7, wanted a Barbie cake.  I have never done a Barbie cake before, but after watching many videos on assembly and looking at lots of pictures, this is the final result:
Chocolate cake with buttercream icing, covered in and accented with homemade marshmallow fondant
The assembly of the cake was much easier than I expected it to be.  I baked two 8x2 round cakes and one dome shaped cake in a Pyrex bowl.  (Note: when baking in a Pyrex bowl, do not overfill and allow for 15 extra minutes baking time).  I used the same chocolate cake recipe from Dad's Tuxedo Cake (found a couple entries down) for its stability and tastiness. I cut a round hole in the middle of each cake, for Barbie to go in later. Then, I stacked the two 8x2 cakes on top of one another, using buttercream frosting as filling, and then stacked the dome on top of that.  I made sure the cakes were very very cold before assembly and this made it much easier to work with.  I had to trim up the sides a little bit because the round cakes were wider than the dome. I then covered my skirt-shaped cake in a crumb coating of buttercream frosting, put Barbie in the center (her bottom half is wrapped in plastic wrap) and let it set up, in the fridge, over night.

I made the marshmallow fondant earlier this week, using a basic recipe I found on cakecentral.com:
16 oz mini marshmallows
3 tablespoons of water
2 lbs of powdered sugar
pinch of salt
1/2 cup Crisco vegetable shortening
1 teaspoon vanilla flavoring
- Melt the marshmallows and water together in the microwave.  Add the vanilla.  Coat your hands, the bowl, and the counters in Crisco. Add the sugar and stir until you can not stir anymore. Dump the fondant out on your greased counter and kneed like you would a dough until it forms a stretchy yet solid ball.  Wrap in plastic wrap and let it set at least overnight before use. -

I tinted the fondant pink with Wilton gel icing colors and rolled it out.  Then, I cut a hole in the center of the round of fondant for Barbie and dropped it over the cake.  Very quickly, before the fondant stretched too much, I pinched it all together in little gathers at the top of her waist, to form the pleats. The natural fall of the fondant formed a pretty skirt.  I filled in the open places at the bottom with buttercream ruffles, to look like a petticoat.  The rest, just kind of came to me as I did it, therefore, I can't really give specific instructions.  If you have any questions, please feel free to ask me! =)

Here are some pictures of Barbie from every angle:

The petticoats are my favorite =)
The back, with a flower bow at her waist
The fondant fell and made pretty, natural looking fabric
The little frosting star pillows are for candles - there are 7.
I wish my writing was better.  Practice, Practice, Practice!

Well, there she is!  I'm really happy with how Barbie turned out, and I really hope the family enjoys their cake.  Lets all keep our fingers crossed that delivery goes smoothly!

Happy Baking!

Wednesday, September 8, 2010

Wilton Flowers and Cake Design Class #1

Tonight was my first class in Flowers and Cake Design!  We learned all about gumpaste, fondant, and how to mix them together to form flowers.  The 'button flower' is a complete pain to mold, but very cute when finished.  It would be perfect for a picnic basket cake.  The pansy is a much more laid back flower to make, even though it looks more complex.  Here are some examples (I was not as careful as I should have been in transporting these home, so I apologize for the 'mushed' look):
button flowers and pansies
purple button flower

pansy
In the spirit of good news, I have my first real cake order for this weekend. WOO!  I will be making a Barbie cake.  Wish me luck and watch for a post with the finished cake on Saturday!

Happy Baking!

Thursday, September 2, 2010

My New Most Favorite Dessert!

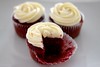
Chocolate Souffles!  Yes, I attempted them.  Yes, they fell after sitting 25 minutes out of the oven. And, oh my goodness, they were so decadently delicious! My husband suggested them, in joking I believe, and I decided to go for it. 
Fresh out of the oven - pretty 1.5 inch rise!
The recipe I used made enough batter for 4 ramekins, with a little left over for tasting! 

Chocolate Souffles:
3.5 ounces finely chopped, good quality, unsweetened chocolate (any chocolate will do, bittersweet or semisweet.  I just had some fancy unsweetened on hand.)
2 tablespoons unsalted butter, plus for preparing the molds
1 teaspoons pure vanilla extract
1.5 large egg yolks
1.5 tablespoons warm water
1/2 cup sugar, plus 1 tablespoons, plus approximately 8 tsp.
4 large egg whites, room temperature

Directions:
Brush 4 ramekins with soft butter, then coat with sugar. Set an oven rack in lower third of the oven and preheat to 400 degrees F.

Put the chocolate, approximately 8 tsp. of sugar (omit this sugar if you are using bittersweet or semisweet chocolate), and butter in a medium heatproof bowl. Bring a saucepan filled with an inch or so of water to a very slow simmer; set the bowl over, but not touching, the water. Stir the chocolate occasionally until melted and smooth. Remove from heat and stir in vanilla extract. Taste chocolate to make sure sweetness is correct - add more sugar to mixture if necessary, according to your tastes. Set aside.

Combine the egg yolks and warm water in a bowl and beat until frothy. Gradually add 1 tablespoon sugar, and continue beating until ribbons form, about 5 minutes. Very lightly fold the yolks into the chocolate mixture. (Rinse the bowl well, if using again for beating the egg whites.)

Put the egg whites in a large non-reactive bowl. Beat on medium until frothy; then gradually add the remaining 1/2 cup of sugar and increase speed to high. Beat until the whites hold a stiff but not dry peak.

Working quickly, fold about a third of the egg whites into the chocolate to lighten; then fold in remaining whites until blended. Gently ladle or spoon the souffle mixture into the ramekins, and place on a baking sheet. The shape on the top of your finished souffle will reflect the unbaked shape exactly, so, if you want a straight top, flatten it and, if you want a rounded top, mound it up.
Immediately bake until the souffle rises about 1 1/2 inches from the ramekins, and the tops are touched with brown, about 14 - 16 minutes.
So pretty out of the oven! They smelled like the most perfect brownies.
The top of the souffle had the crunch of a meringue cookie, while the inside was light and airy.  Mix those wonderful textures with a smooth, dark chocolate taste, and we have the most perfect desert ever invented!
Both mine and my husband's souffle ended up like this - all gone!
We have two souffles left.  I stored them in the fridge overnight, and I am really excited to see how they are when fallen and cold.  I'm expecting a pudding, kind of.  =)

Happy Baking!